SEEING HALOS
#2 in a series on finishing images before printing.
Warning. If you have been a landscape photographer for some time, you may not like this article. It may cause you to look at things in a way that makes you uncomfortable with some of your published or printed images. It certainly has had that effect on me! This is the second in a series of articles on finishing your images for print.
Back in 2015 I started developing a group of dentist-photographer friends. This has been one of the more rewarding aspects of taking up landscape photography. We were all advancing in our compositional skills as well as our post-processing skills. This was the same year that Adobe added the Dehaze Filter to its Lightroom and Camera Raw programs. This could solve the challenge we faced where skies were too bright and hazy and foregrounds were too dark. We could darken up the skies, make clouds stand out with added contrast, especially in the lowest contrast (haziest) areas and darken the blues. Then, in 2021 the Select Sky and other related tool came out. We could apply this filter just to the sky. Yippee! But, in my opinion, in this has often created an unnatural mess.
The addition of these tools to help us improve our results has not been without negative side effects. These side effects are very unnatural looking artifacts in finished images. Even from some of the most highly respected photographers in the business. Unfortunately, I am also one who has produced some of these poor results. Interpretation of what looks good and what doesn’t look good is very individual, so if you don’t see an issue, I am fine with that. But it’s one of those things that once you see, you can not unsee.
The side effects are primarily unnatural contrast at the horizon and untreated areas of sky between branches and leaves on trees. These are areas where contrast in tones is considerable either before or after processing. The top edges of mountains will look dark and the bottom edge of the sky will look bright. In other words, the result is a halo. Photographers know about unnatural edge colors in these areas. These are what we call fringing or chromatic aberrations. Solving the issues of halos and aberrations is handled in very similar ways with the stamp tool. The rest of this article will show you the problems and how to deal with them.
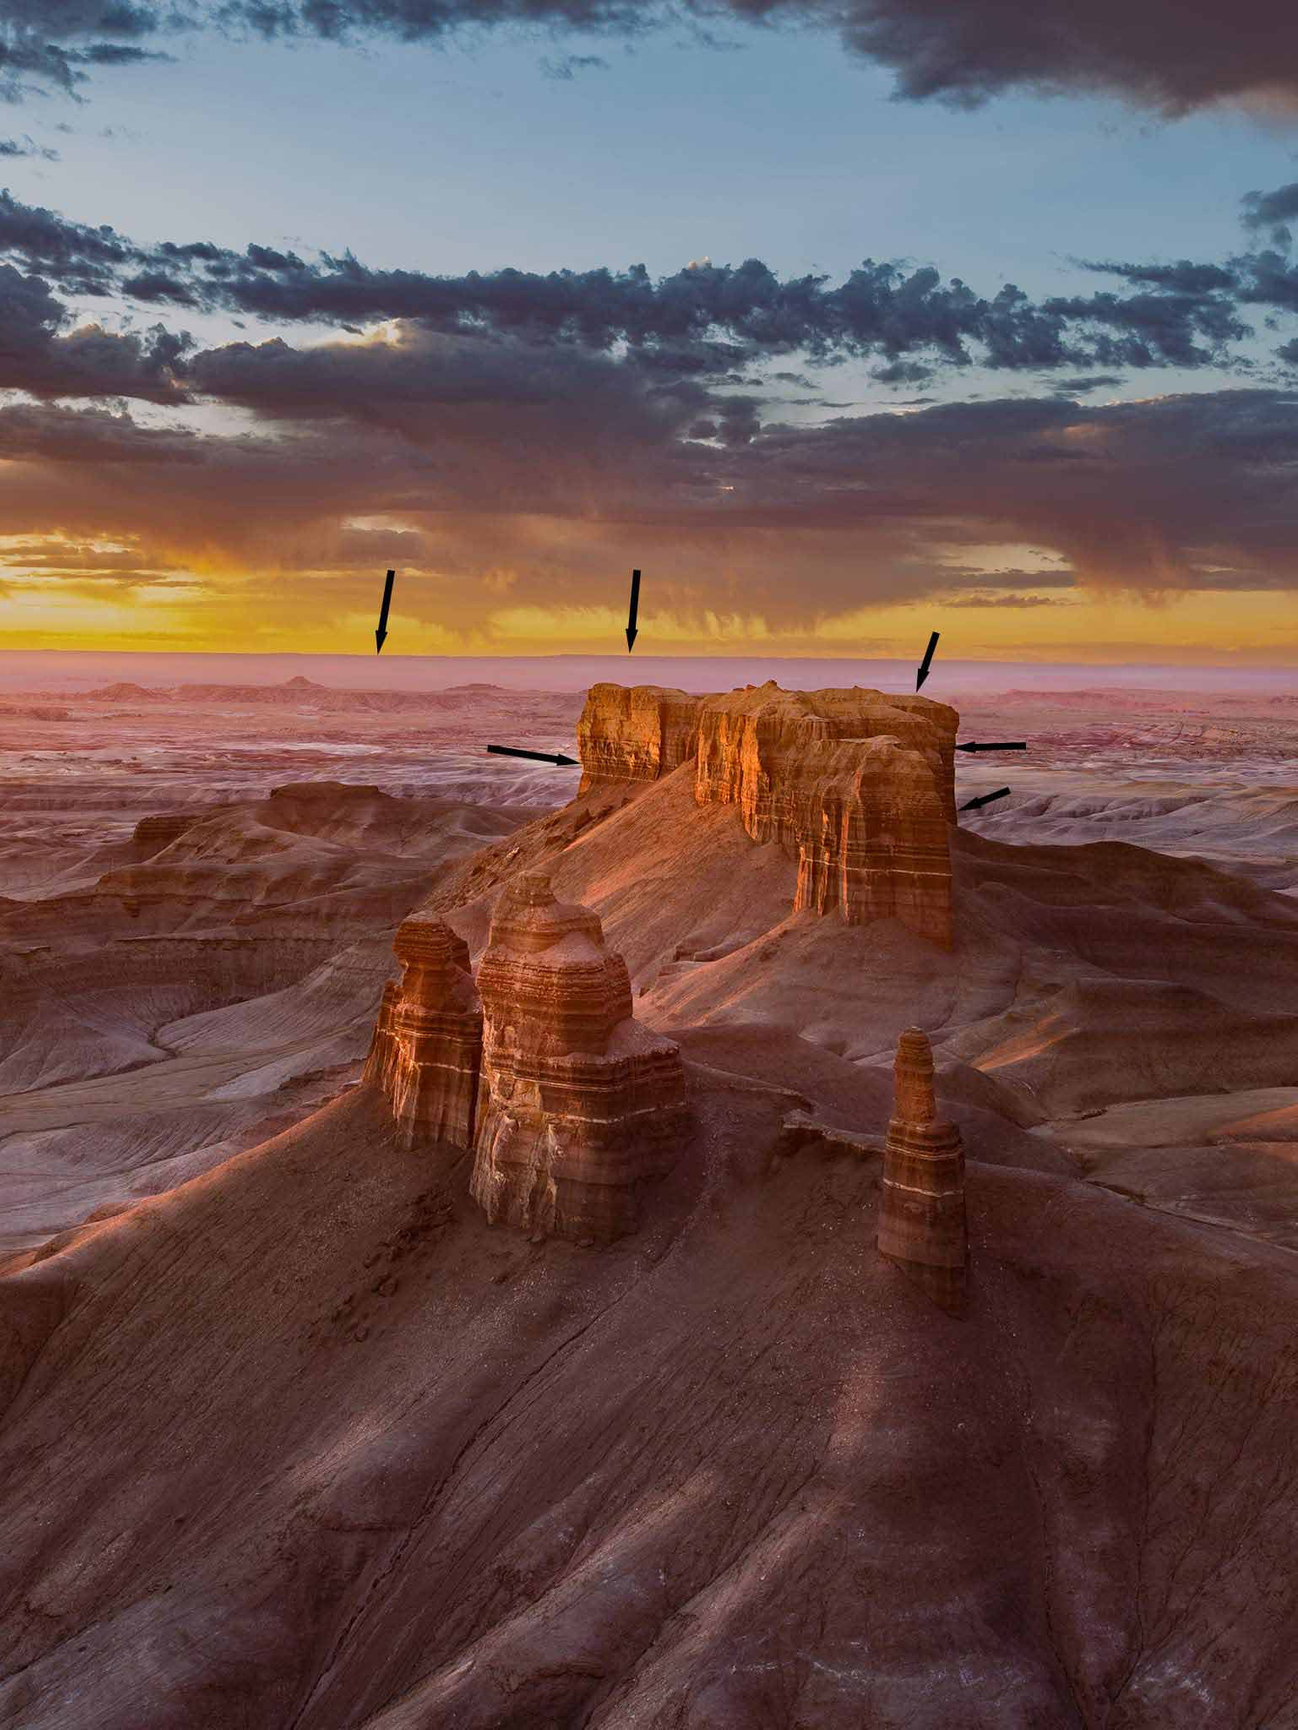
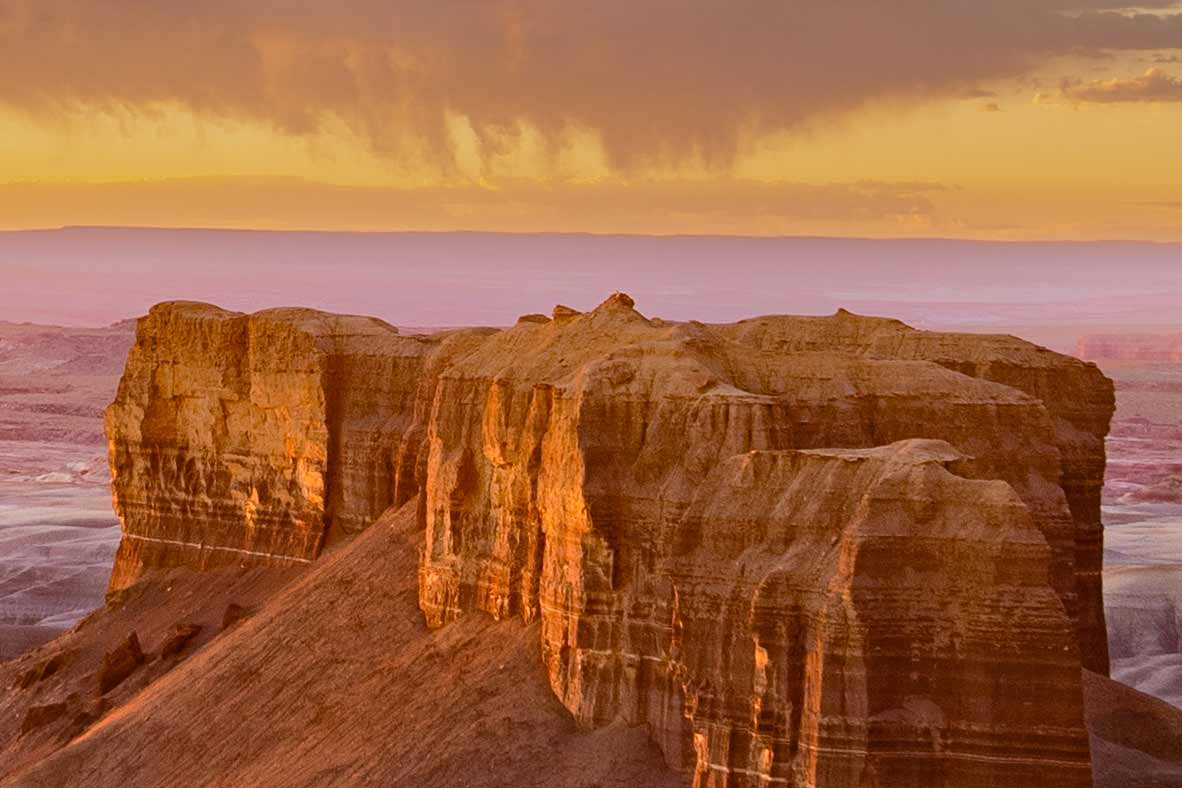
I would really prefer to show these problems with other photographer’s images, but I am going to use my own. The first image is a raw file. Although I took a series of exposures to deal with the large dynamic range, all the edits here are from this single exposure. The second image is after doing initial edits in Lightroom and Adobe Camera Raw. Enlarge the images and pay particular attention to the horizon and the area around the largest butte.
The following written tutorial may be easier for you to understand if you work through one of your own similar images using these steps, or you can download this image here.
These steps assume a basic understanding of the use of tools available in Lightroom (LR), Photoshop (PS) and Adobe Camera Raw (ACR). If you don't know how to use these tools or corresponding tools in other post processing programs, please view a few Youtube tutorials on their use.
Step 1.Determine whether you need to separate the sky from the land before your next step. First, make a duplicate layer (Comm or Ctr J) in PS. The create a New Layer (Comm or Ctr + Shift + N) with Color = None and Mode = Normal on top of the duplicate layer. On the duplicated layer, Select Sky. If you get a clean selection across the horizon, go to Step 3. If you get a selection that includes any land area, go to Step 2.
Step 2. Separate the sky from the horizon. Since if they are nearly the same value, you will have to separate them by color as I have done here. Add a mask to your duplicate layer. Now go to Select/Color Range. Hold down the Command (Mac) or Control (PC) key and use the dropper tool to select all similar ranges of color. In this case I selected several similar shades of the pinkish hazy area. Option/Click the mask to add or subtract to the mask. Set your brush tool with a hardness of about 80%. Avoid brushing over any details that you want to preserve in your hazy area.
Step 3a.Darken the lighter side of the halo. Let's say your sky is lighter than the horizon. Work on the top (transparent) layer. Select the stamp tool, set the size to around 10px to 20px, the Hardness to about 20% and the Opacity to around 60-80%. Adjust these settings as you see fit. Set the Mode to Darken. Set the Sample layer to Current and Below. Start at one edge of your image. Select (Option/Click) the sky immediately above the first halo area of sky. Then click-hold down and drag the stamp tool across the horizon. It is safe to overlap the land because it is already darker than the sky, so it should not be affected. Use the shift key to cover wider spans at one time. Save your work often. The first pass usually is adequate on this, but if not, make a second pass. When done, go to Step 4a.
Step 3b. Even the tones in your hazy area. We will be working on the top (tranparent layer). Select the Stamp Tool. Set the Hardness to 20% or less and the Size to somewhere between 5px and 40px. Set Sample to Current and Below. You will determine this size by experimenting. Start with a lower flow and wider area. After each pass you may cut the size of the brush down and increase the flow. You will be working closer to the horizon with each pass. Set the Stamp tool to Mode=Lighten. Start at one edge of your image. Select an area just below the areas you want to affect with Option/Click. Now when you move across an area you will be stamping your selection onto the area you are brushing (or stamping). When the horizon is a straight line, you may hold the Shift Key down to cover larger spans all at one. If your horizon is jagged, you will need to do shorter areas at once. Stop and reset your reference point often, especially if there are irregularities. Once satisfied, Save and go to Step 4b.
Step 4a. Lighten the top edge of the horizon. Because the land is darker than the sky, the sky shouldn't lighten. Select the Stamp Tool the same way you did in Step 3a, but this time set the blend Mode to Lighten. Do the same process as you did for the sky, but select the area directly below your starting point as your reference. I recommend starting with a broader brush size and lower opacity for your first pass to keep nice smooth transitions. Then decrease the brush size with each pass. Be sure to stop and reset your reference point often and save each time you are comfortable with all of your changes. When done, go to Step 5.
Step 4b.Darken the halo on the sky. Duplicate the three layers, then Merge the duplicated layers (Comm E or CTR E). Next, duplicate the merged layer. Option/Click and Drag the mask from the second layer up to this layer. Click on that mask. Invert that layer. Newer versions of PS will give you a pop up window to do this. Select the Stamp Tool the same way you did in Step 3b, with the same settings, but this time set the blend mode to Darken. Use the Stamp Tool with the same settings used in Step 3b in a top New Layer (transparent), but select your reference point from the sky just above the horizon line. Note that if there are irregularities of colors in the sky (such as a cloud coming down or lightning hitting the horizon) you will need to be careful on the positioning of your reference point. When you are done, save the image, then duplicate the top three layers and then merge the duplicated layers.
Step 5.Remove/reduce the halo around the top and sides of the butte. Duplicate your top layer and create a New Layer (transparent) where you will do you work. Select that layer. Select the Stamp Tool with settings around 5px to 15px (smaller than the setting for sky since there are likely more details that you don't want to blur); set the hardness to about 80% to reduce fuzziness and set flow to about 80%. Experiment with these settings to your liking. Set the blending mode to Darken when the butte is darker than the background. When you do this, a stroke with the stamp tool that hits the darker area will not affect any area that is darker than the selection area. For the horizontal areas (top of butte), select a reference spot (option-click) immediately above the halo, but not including the halo. Click and drag the stamp tool along the edge where the halo is present, being careful to stop and restart with a new reference point every so often. If there are projections and depression along the top, you may have to reposition your reference point. Once done with the horizontal halos, work on the diagonal halos and vertical halos the same way, but select your reference point from the area immediately horizontal to the spot where you are starting. When done, save your work.
Step 6. Selectively remove any artificially darkened tops on your subject (butte, mountain, tree, etc). Follow the procedures in Step 5, but set the blend mode to Lighten. Any background areas that are lighter than the butte will not be affected. When done, save your work.
Note that the Select/Subject may allow you to accurately select the butte and work on it and the background separately as you did for the sky and horizon for more accurate results.
Some Tips
When editing a horizontal line with the stamp tool, make your initial selection from directly above or below your starting point.
When editing a vertical line, make your selection from straight to the side of the starting point and as close to the area to be edited as is safe so you are not hitting a lot of irregular areas.
When editing a diagonal line, usually you will select an area in the same horizontal plane as your starting point so that irregular brightness areas continue horizontally into the diagonal line.
Save time by using the shift key on lines that are fairly straight.
Always stop and reset your starting point often, so that if you make a mistake you don't have to start from scratch. Save your work often and whenever you feel all your edits to that point are good.

Another place where halos are created are around smaller leaves and branches of trees and in spaces where the sky shows through the branches. Usually, the tree leaves are darker than the sky and you are also darkening the sky.
It could be argued that the halo behind and around this oak tree was a gift to the photographer, much of it was created by darkening the sky.

There are times when the value of the sky and a tree leaves are fairly similar. The Select/Sky tool may leave many of these areas unselected, so if you darken the sky, these areas will remain unnaturally bright in your image.
This image shows the sky selection in ACR where the selection is indicated with purple colors. Note that many areas within the top and bottom leaf areas of the tree are not purple, indicating they were not in the selection. These areas will not be included if you darken or lighten the sky.
In this case, we will assume we want to lighten the sky to provide more contrast between the leaves and the sky. The unselected sky areas between the leaves would remain too dark. If you wanted to darken the sky, the unselected areas of sky will be too light. Because the colors of the leaves are mixed, some lighter, some darker, the Stamp Tool is not the best choice. In this situation, a better choice is to separate the sky from the tree by colors. Select the radial gradient to surround all the tree leaves, then intersect this with a Color Selection (use the color picker on the grey sky colors) in LR or ACR. Refine the selection colors as necessary. Your changes will be applied to the colors of the sky you select, but not to the green leaves. To have more control with this technique, work on smaller areas rather than the entire area of sky behind the tree. Because the trunk of the tree may be similar to the color of the sky, you may have to go back and mask it out of your changes.
As you get comfortable using the stamp tool to deal with halos, you will find it much easier to use it to address chromatic aberrations.


